Thursday, June 30, 2011

Home-Made Diaper Wipes

Okay, so I took some really great pictures of this project, but I can't get them to upload at this time for some reason, so I'll just have to post without pictures for now. Hopefully I'll be able to upload later.

I haven't posted in quite some time, because quite frankly, I haven't had time to do any "big" projects for a while. Then I was inspired by this post over at the Intentional Homemaker and decided to make some re-usable wipes to have on hand at our house. While I do not do cloth diapers, we have two in diapers still, and lots of messy faces to wash, so it makes sense. You can also find in that post a link for where to buy re-usable wipes.

I just bought a package of four coordinating flannel receiving blankets and cut them down to 9x9 inch squares. I then placed them right sides together and sewed around the edges, leaving about an inch and a half opening for turning. I like to trim the edges at this point so you don't have a bunch of extra fabric when you turn in right side out.

After you turn the fabric right side out, are left with a nice little double-layered square of flannel. I like to run a zig-zag top stitch all around the edges to finish it off nicely.

It only took about three hours (I am a VERY novice seamstress!), and I have about 30 really cute re-usable wipes! These fit nicely folded in half inside a wipes case or even a travel wipes case. Tie a stack up with a pretty ribbon and you have a beautiful hand-made baby shower gift.

Sunday, January 23, 2011

Test Post

Cannot believe it has been more than six months since I posted! Life has been busy with four kids five and under!

I decided that since I have 3 boys and only one girl, I am going to endeavor to enjoy her girly-ness more. To that end, I am trying to convert our office into a separate room for her. This is a HUGE project to take on!

Also, in browsing online the other night, I came across this charming site with some great ideas for some very girly hair styles! After reading her blog, I think I may have to buy some more hair "pretties" for my daughter and bribe her to stand still for me long enough to try some of them!

Tuesday, June 22, 2010

Airplane Party


This was for my son's third birthday. I absolutely love this wall art--I may have to find someplace in the house for it just because it makes me smile!

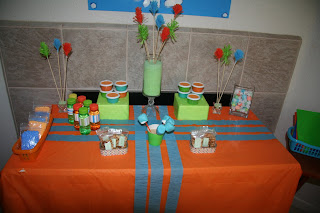
Get ready for a long post with lots of pictures! We did an orange, green and blue airplane party, which was really inspired by THIS and THIS post from Kara's Party Ideas. If you like parties, hop on over there and check out her site. It's filled with great inspiration for all kinds of celebrations!

I have two boys just under two years apart, so I decided to do the same color scheme for both of them, with just a little different twist. If you want to see what I did for the other party, look at my post for my one-year-old in May.

Since it was an airplane theme, I packaged up in-flight meals for everyone. These were for our youngest fliers.

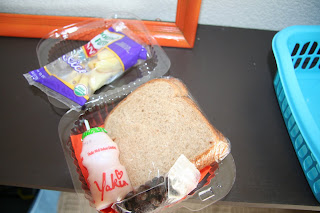
They got a small package of raisins, bag of organic apples, a small juice, and a peanut butter and honey sandwich.


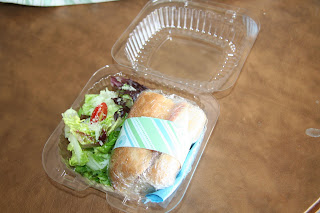
The adults got in-flight meals consisting of a turkey and cheese sandwich and green salad. We also had a table set up of condiments and extra sandwiches, salads and chips for those who wanted a little more during the flight. They were warned to be careful when opening their meals as some items may have shifted during take-off.

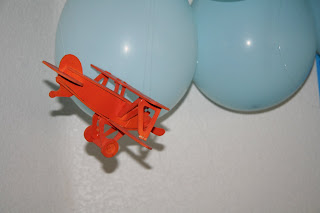
Love this plane coming in for a landing out of the clouds!

We had a iced tea and lemonade bar set up. I am just sorry I didn't get pictures of it before the party started.

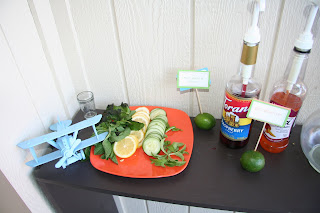
Close-ups of the additions for the iced tea. The fresh basil with raspberry syrup was the big hit of the day! I could drink that stuff forever!!

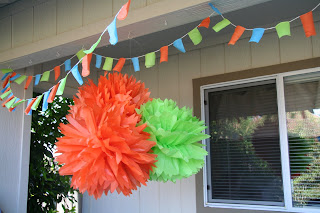
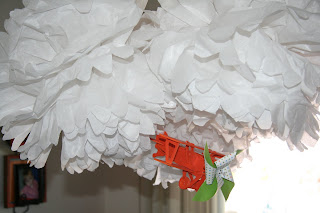
This just makes me happy! I love the banner and the pom-poms! For once, they actually turned out full enough! I used 10 sheets of tissue paper instead the 8 I usually use. That must be the trick!

Ordered this cake from Costco! I usually make the cake, but realized my limitations this time!

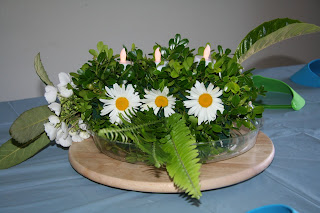
This was made by my mother-in-law. It was a plane made entirely from foliage and flowers! I think it was so creative!

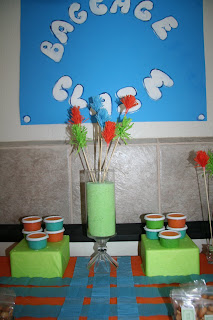
Here is the "baggage claim" area where the little kids got to fill their treat bags before going home. I really like the idea of this, but the sign didn't really turn out like I wanted. Maybe I should have made the sign stretch across the entire wall space.


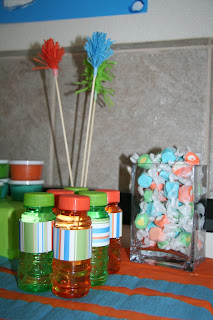
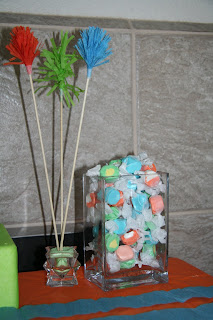
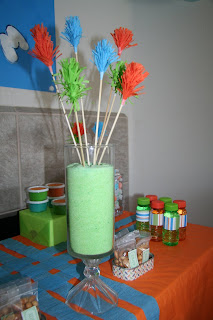
I don't know what these are called, maybe fourth of July sparklers. They are from the Martha Stewart website, but I got the instructions HERE.


These airplanes were a pain to make, so I enlisted some help from family--thanks everyone! They were puzzles from the $ store and started out as flat pieces of wood that you had to punch out and put together. After that, we spray painted them to match the colors of the party and added windmill props to some of them. Loved that whimsical touch! I was going to give them out as favors, but decided after all that work to save them and maybe use them as a decorating theme in my boys' room!


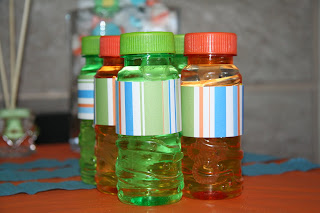
The kids got to fill their bags with small packages of floam, bags of peanuts, bubbles, marshmallow pops, salt water taffy and home-made play dough.


We also did a small craft where the little ones got to decorate their "pilot visors" with stickers. Hmm...I didn't even notice that pepsi when I took this picture!

Without even planning it, almost everyone who came to the party was dressed in either orange, green or blue! Too funny! All in all, it was a fun party, but I am sure glad I don't have another birthday party to plan until October (I do have another Birth Day before then though!).

Hope you enjoyed this post and all the many pictures!

Monday, May 10, 2010

Mother's Day Brunch at my house!


So, I mixed up the order of the pictures in this post and I just don't have time to go back and fix it right now. So...this is a body scrub that I made for my mom and mother-in-law. I got the recipe from Stephanie Lynn at underthetableanddreaming.com My mother-in-law tried it and told my it was fabulous!

Here is my son posing at his place at the kid's table. He was so excited to eat his brownie treat, I think it may have been opened before anyone even got here.


I made this food labels and am disappointed you cannot see the writing in the photos, but they looked nice in person.

My 4-year-old has recently discovered a cooking show she loves to watch and is always wanting to try the recipes. This was a pretty easy (and very tasty) fresh strawberry pie that she made with the help of her daddy and myself. She made two of these as a gift for her Grammy and Baba. It looked so pretty on the table.

Roses from my sister's yard.


These were some small bouquets my mother-in-law made for me using flowers from her yard. They were such sweet displays! They made me think of my three sweet little babies!

The favor basket at each place setting. They were tiny baskets filled with a brownie bite tied with pink cellophane and two plump fresh strawberries. I tied a small turquoise bow on one side of the handle. Each one only set me back about $1.50 and they really made a sweet sentiment on the table.

This was supposed to be the first picture! All of my siblings were home this year except for one (we missed having you and your family there Trish!) and we wanted to be able to relax and visit so we decided to have a brunch at home instead of going out. Since all of our family gatherings are usually at my sister's house, we decided to give her a break and have it at my house. I wanted to make the setting pretty without going a lot of trouble or expense. So after deciding on a color scheme of pink and turquoise I "shopped" my mom and sisters houses. My husband wanted to make it as little clean-up as possible and use paper plates and such. I was not really into this idea at all, as it did not mesh with my idea of a nice Mother's Day brunch...but I finally caved to his idea and we found some nice paper products at Target and I think the table looked pretty after all. Everyone brought a brunch item and I wish I had pictures of the brunch table but I was too busy at that time to take pictures. Sigh. We had a coffee and waffle station, two kinds of quiche, potatoes, chocolate filled croissants, biscuits, fruit, veggie tray, bacon, sausage and sweet vidalia pudding as well as cookies and strawberry pie. It was all very yummy!


Another picture of the place settings. I didn't have enough turquoise placemats so I alternated between these and some deep red chargers that I usually use at Christmas. The "silverware" is plastic, but it is the kind that looks real. My husband was right, clean-up was a breeze. And really, when you have 17 people for dinner, you have to go with some shortcuts!


We all had a nice time and it was so much better to be at my house than trying to take three children under five to a buffet!!

Hope everyone had an equally wonderful Mother's Day!

Building Project, Part 2


So, I finally finished my console table. Well, mostly finished it. I think I may put a coat of polyurethane on it for further protection. It is not completely square, and very far from perfect, but as I have NEVER built anything in my life, I am pretty happy with it! If you have not seen her blog, you MUST go visit Anna at knockoffwood.com (where I got the plans and inspiration to try this table) --she has so many great furniture plans over there!

This is not the final display for this table. I took this picture on M0ther's Day and this matched the table decor. The small flower arrangements were made for me by my mother-in-law (symbolizing one for each of my three kids), and the roses in the round case were from my sister's yard. The silk ones in the blue vase were a mother's day gift from my 4-year-old daughter. They are my favorite ones :)

I am linking this up to Shanty2Chic's I Made it Without My Hubby party.

Tuesday, April 27, 2010

Trying My Hand at Building!

Here is what my 4-year-old daughter and I have been working on! We got the plans from Anna White at Knockoffwood.com. She has an amazing array of furniture plans that she offers for free use. After looking at all the incredible photos of what beginning builders (and by beginning I mean, "I have never built anything in my life" builders) I got inspired and thought maybe I could do something like that. This is my very first project, and I had some trouble with my boards not being perfectly straight so it's not totally plum but I am pretty proud of it for a first try! I still have to finish the screws in the top (drill is charging) and then I will paint it. But here she is in all her unfinished glory!

I tried this one first because it seemed to be one of her easiest projects.

Things I discovered along the way:
Straight boards may not be truly straight, even if you do all the right checking for straightness!
It is very difficult to hold two long boards at right angles by yourself while you screw them together! (Maybe this was the real problem!) My daughter helped me hold the boards and watched to make sure the screws didn't pop through the wood at the wrong angle. She was so proud of helping me build it! I took pictures of her but now can't find them on my card. Sigh.

The next projects on my list are Anna's toddler picnic table, the activity table and bunk beds! My husband will have to help me with those I think! Check out her site and get inspired and start building whatever you need (want) in your house!

Thursday, April 15, 2010

Entertainment Center Re-do

I inherited this entertainment center from my husband when we got married. It really is not either one of our tastes, but for the moment, it is what we have. So many things about this bother me, where to start? My 10-month-old loved pulling all the DVDs off the shelves (notice how they are all up high?) Do you love the pull-ups box? Some things you just get used to seeing. I didn't even notice it when I took the picture!
The first thing I did was to make curtains out of painter's drop cloth. I didn't have a small enough rod to hold them in place, so I made a hem and put a pencil through it cut just slightly longer than the width of the shelving unit. I then drilled a hole on one side just the size of the pencil, stuck it in the hole and wedged the other side of the pencil against the inside of the shelving part. Does that make sense? I did this on both top and bottom and left the sides of the curtain open so we can still get to the DVDs. My son does not even go near the movies now!
Here is the almost completed after. My sister sprayed a primer on it, then spray painted the entire piece a deep espresso brown. I LOVE how it looks now! The only thing I still need to do is hide all the cords! Thinking of putting beadboard on the back to take care of that. The entire process cost less than $20.00 and it doesn't hurt my eyes anymore! My husband liked it so much he wants to do our table and chairs next.